Crayola ColorStudio HD Pen - Hack
(04/08/2012)
Recently I have been doing some research looking at how we can extend interaction around our digital devices and be able to more seamlessly share and extract information from the many displays and devices within our environment. As part of this I have undertaken various projects which make use of more novel non standard forms of communication such as light, sound and touch. In exploring this I came across the Crayola ColorStudio HD pen and have found a way to hack it to be able to send data to a capacitive touch screen device.
The Crayola ColorStudio HD pen is $30 stylus device designed for use with the ipad and a custom Crayola colouring application. The intention is that you download the free drawing application which you then unlock and activate by placing your ColorStudio pen on the display. Having already made some custom PCB that use capacitive communication I immediately recognised the familiar sound of a reed relay being turned on and off when using the pen. Knowing that the device contains a relay it becomes clear how the app works, by pulsing this electromechanical component at a constant frequency this is detected by the tablet as a series of touches and distinguished from a standard finger touch. Having used the same technique in my boards I was able to reprogram the pen to be able to transmit data as is shown in the video.
The video shows the hacked Crayola pen being used with a drawing application where the pen is actively transmitting the current ink colour to the tablet. The physical pen therefore displays it's current ink colour through the LED and then pulses this to the display where it is decoded and used to set the digital canvas ink colour.
Crayola Pen Hack - Capacitive Communication
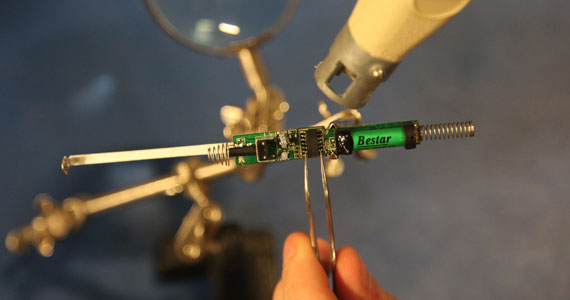
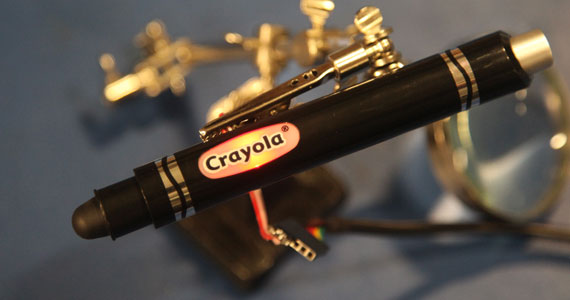
If you want to test out capacitive touch based communication you can follow the steps below to reprogram the pen. The Crayola ColorStudio HD pen as shown below is designed by Griffin Technologies for Crayola and can be bought for about $30 online or from most Apple stores.
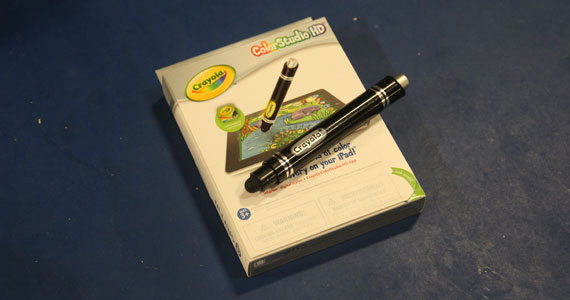
Crayola ColorStudio HD Pen
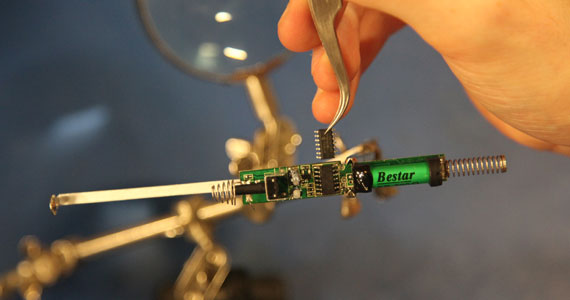
The first step is to get to the pens PCB and remove the existing microcontroller so that it can replace it. The pen is quite easy to dismantle just requiring you to remove the single screw to the battery compartment and then snap back the various plastic connectors which hold the PCB in place.
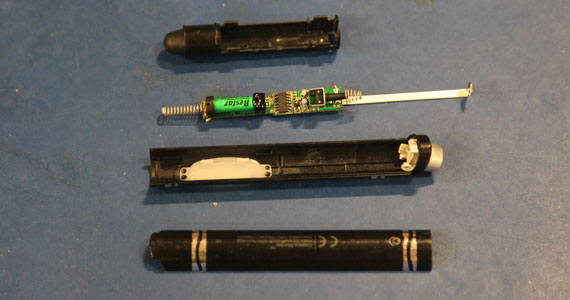
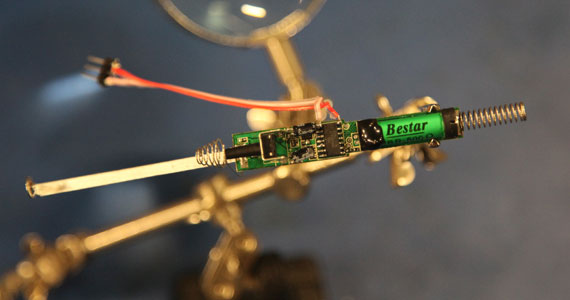
Pen internals
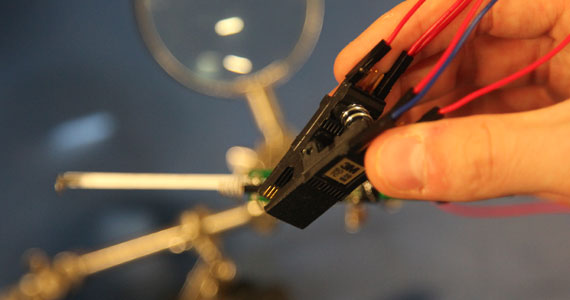
Once inside you can see that the pen is basically formed of a microcontroller and a reed relay which is pulsed on and off providing the needed grounding to register a touch on the capacitive display. As you can see the relay it self is connected to a spring which is then forced against the tip of the pen when assembled thus ensuring that contact is always maintained.
Crayola pen PCB
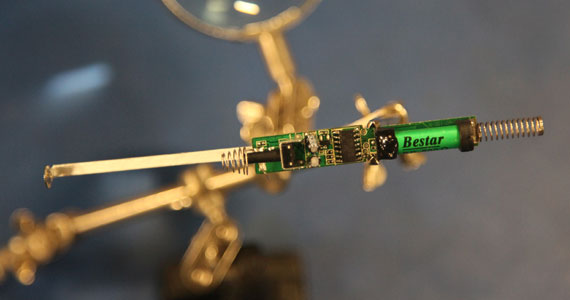
The pen is built around the PIC 16F505 microcontroller which you can see in the centre of the board. As I have little experience with PICs and no dev board I decided to replace the component entirely and use a Attiny 44 instead which luckily has the same pin layout as the original microcontroller. To remove the IC I simply used some solder braid and a pair of tweezers to ease it from the board.
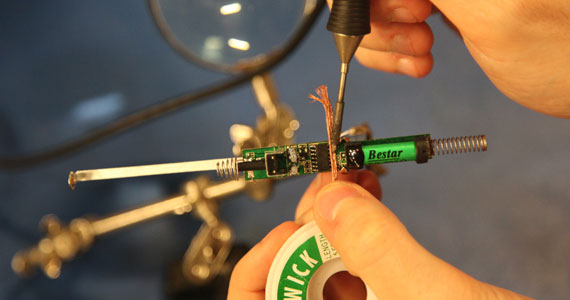
Remove existing solder with braid
If using the braid fails you can always use a heat gun and a few sharp taps against a hard surface to force the IC from the board.
Using a heat gun to remove the component
Once removed simply solder the new Attiny 44 onto the board ensuring that the IC is orientated correctly...
Replaced microcontroller
To program the new microcontroller I used a 3M Test clip connected to a TinyISP. Attaching the test clip can be quite a tricky process as there is little space on the board. If the clip keeps falling off you may need to sand down the plastic tip to ensure it can make sufficient contact.
Attaching the Test Clip and flashing the new application
To speed up the development process I used the Attiny Arduino library which was flashed to the microcontroller with the ISP. Instructions on how to use the Arudino IDE to acheive this can be found here.
Attached wire for external power source
It wasn't entirely clear how the original pen regulated the power and so I was unable to get it operating from the original battery. As a quick hack I therefore just soldered some wire to the corresponding pins of the microcontroller. Once you have the pen powered from an external 5v supply you can then flash the attached sketch onto the micro which will control the LED and relay for communication.
Testing the new microcontroller
Once reprogrammed the pen should flash various random colours for a few seconds before then cycling through red, green and blue every 10 seconds.
Powering up the hacked pen
To test the pen install the attached android application to a tablet or device with a capacitive touch screen. The application is a basic canvas drawing app that allows you to select various ink colours and use the pen to do free hand drawing. If the pen is held against the display for a few seconds the application will detect the pattern being transmitted and will automatically change the canvas ink colour to match the pen.
As the pen is actively pulsing the reed relay this is detected by the tablet as a series of touch points over time. Much like morse code this then decoded to represent a specific colour which the Android app displays. In this example it transmits a single byte of data which is then mapped to one of three possible colours. Although this is not implemented it would be very easy to transmit 3 bytes which would in turn represent an RGB colour value which the tablet would be able to decode and visualise.
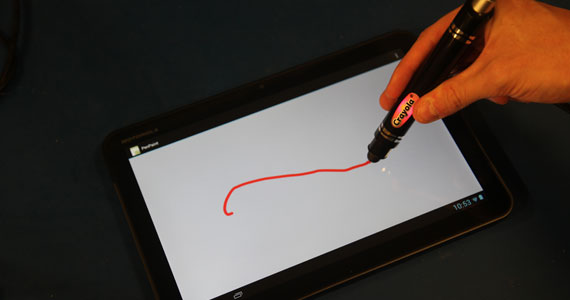
Pen actively communicating with Android tablet
If you look at the Arduino code and the Android application you will see that this a quick hack that demonstrates the possibility of this communication method. The code provides basic functionality to send binary data and decoded this on a capacitive touch screen device. There is no error checking and no explicit attempt was made to make it efficient and so there is a lot of scope for improvement...
Components
1 x Crayola ColorStudio HD Pen 1 x Attiny 44 1 x Android Tablet (Capacitive Touch Screen) 1 x ISP
Source Code
The full source code for both the Android application and the pen it self can be found in the GitHub repository. These are basic proof of concept applications and so have not been tested and are likely to have mixed results between mobile devices.